For years my front beds looked tired because I wasn’t paying attention to them. Flowers would bloom in spring, then fade by summer, and I’d do nothing but watch them decline. Flower bed ideas for front yards seemed overwhelming until I realized the problem wasn’t the beds themselves. It was that I’d never actually looked at what grew well in that specific patch of sun and soil.
I started noticing what survived without much help. Which plants came back year after year. Which ones the deer left alone. Which ones actually looked good in July, not just May. Once I stopped fighting the space and started working with it, everything changed.
A front yard that works is one you notice every morning, not one you apologize for.
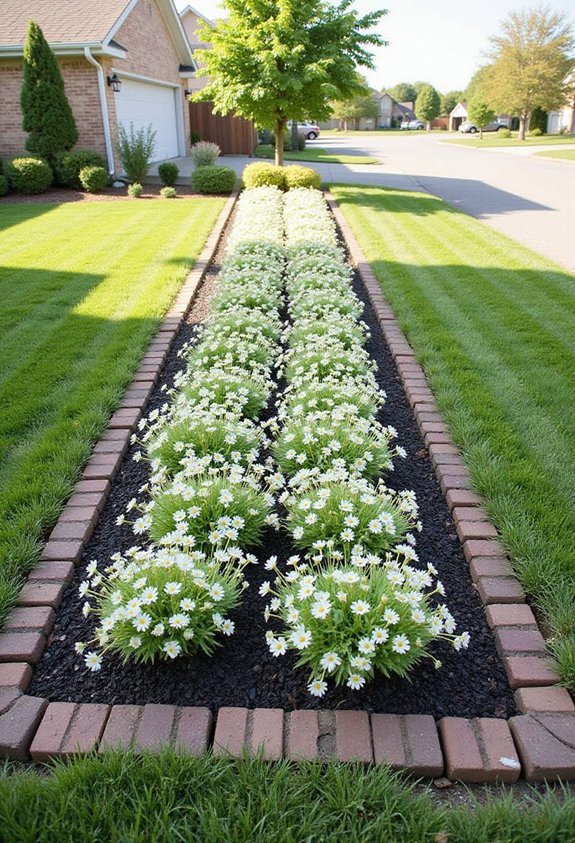
1. Classic Rectangular Beds With Seasonal Blooms
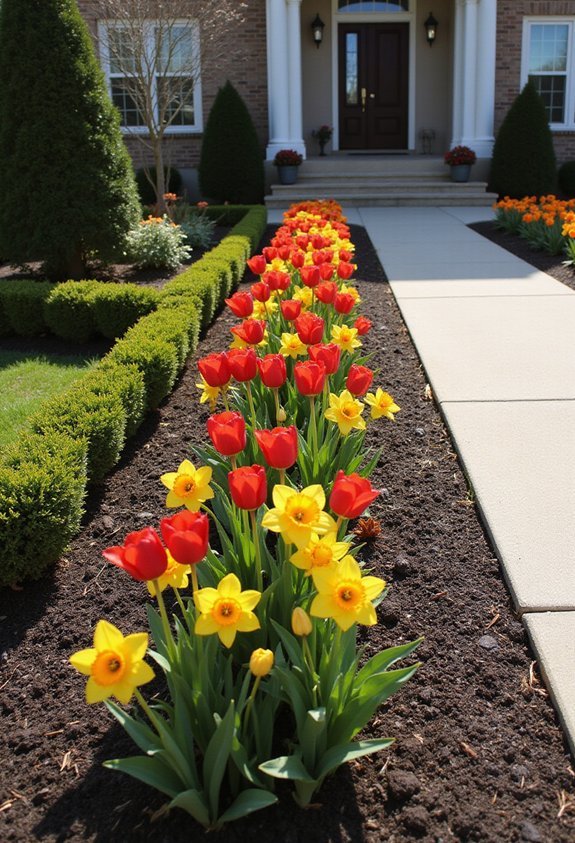
Everyone’s drawn to the timeless appeal of rectangular flower beds—they’re orderly, versatile, and they’ll frame your front yard beautifully. I’ve found that this classic shape works exceptionally well for rotating seasonal plantings.
In spring, I plant tulips and daffodils for vibrant early color. Summer calls for dependable favorites like zinnias and marigolds that thrive in heat. As fall arrives, I swap in mums and ornamental grasses for warmth and texture. Winter evergreens keep beds looking structured when other plants fade.
The rectangular format makes bed maintenance straightforward. You’ll easily edge the borders, and the defined lines prevent soil from spreading into your lawn. I space plants according to mature size, ensuring adequate room for growth. This approach maximizes visual impact while keeping your front yard polished and inviting year-round.
Also read: 14 Front Yard Landscaping Ideas Using River Rock
2. Circular Island Gardens for Visual Interest

While rectangular beds offer clean lines and predictable appeal, circular island gardens create dynamic focal points that draw the eye from every angle. I’ve found that these rounded designs work beautifully in open front yards where they’re visible from the street and driveway.
You’ll want to place taller plants in the center and graduate to shorter specimens toward the edges. This tiered approach guarantees every plant gets adequate sunlight and visibility. I recommend choosing plants with varying bloom times so your garden stays colorful throughout seasons.
Circular beds also make maintenance easier—you can walk around them without stepping on soil. Mulching around your selections keeps weeds down and retains moisture. The continuous curve creates movement and elegance that rectangular beds simply can’t match.
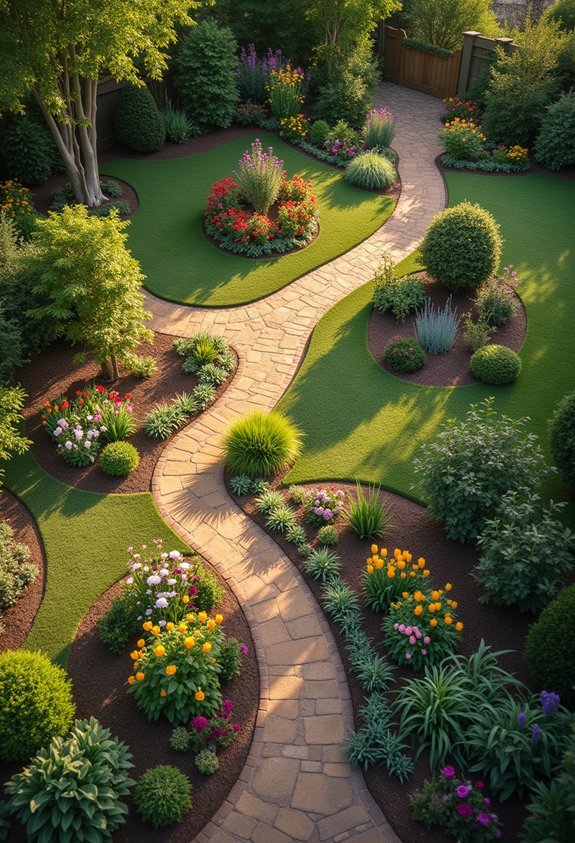
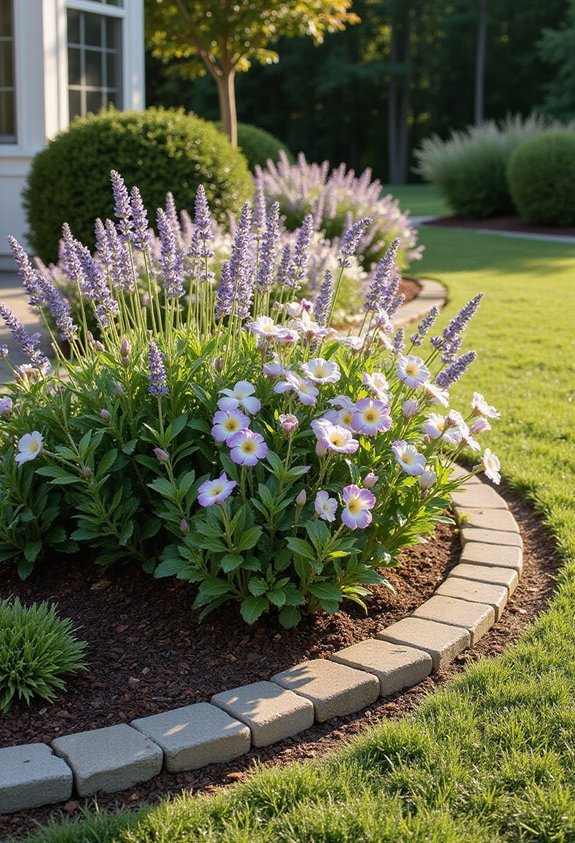
3. Curved Border Designs Along Walkways
Most front yards benefit from softening hard edges where concrete meets landscape, and curved borders along walkways achieve exactly that. I’ve found that curved designs create a natural flow that guides visitors toward your entrance while adding visual appeal.
When I plan these borders, I consider the walkway’s existing shape and build gentle curves that complement it. Rather than planting straight lines, I alternate flowering plants, shrubs, and ornamental grasses in varying heights. This layering technique creates depth and interest.
The beauty of curved borders is their versatility. You can plant seasonal flowers for rotating color, or choose perennials for year-round structure. I typically leave 18-24 inches between the walkway edge and plantings to prevent overgrowth onto the path.
These flowing designs transform ordinary walkways into landscaped focal points that enhance your home’s curb appeal considerably.
4. Tiered Raised Beds for Dimension
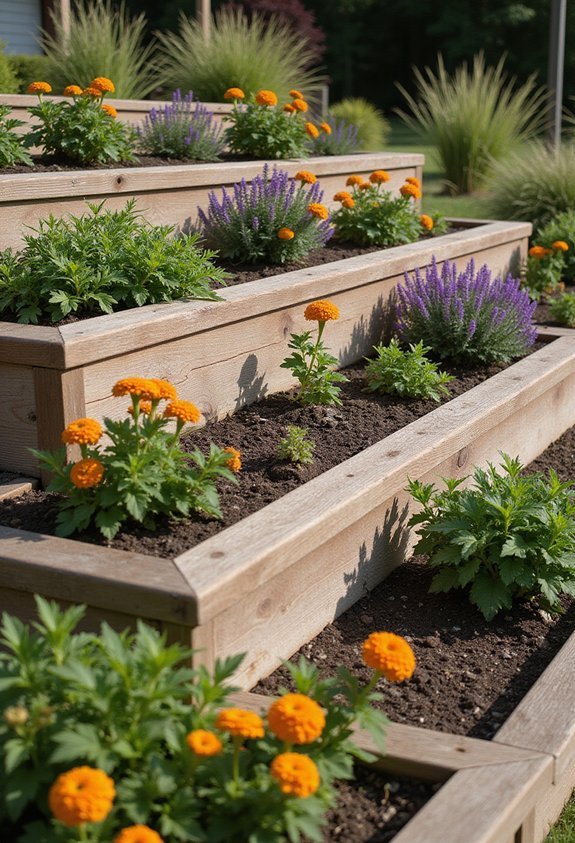
Tiered raised beds add dramatic visual interest to flat front yards by creating multiple levels of planting space. I’ve found that stacking beds of varying heights transforms monotonous landscapes into dynamic garden features that draw the eye upward.
You can construct tiered beds using wood, composite materials, or stone, positioning them to follow your yard’s natural slope or creating an artificial cascade. I recommend placing taller beds in the back and shorter ones in front to guarantee all plants receive adequate sunlight and visibility.
This approach lets you plant complementary flowers at different heights—trailing varieties spilling over edges while upright specimens anchor upper tiers. The dimensional effect makes your front yard appear larger and more professionally landscaped, instantly boosting curb appeal while maximizing your growing space.
5. Native Plant Selections for Low Maintenance

Once you’ve established your tiered beds’ structure, selecting the right plants makes all the difference in creating a landscape you won’t constantly maintain. I’ve found that native plants thrive in your local climate without demanding excessive watering, fertilizing, or pest management.
Research which species naturally grow in your region—they’re adapted to your soil conditions and rainfall patterns. Visit local nurseries or native plant societies for recommendations specific to your area.
Native selections offer another advantage: they attract local pollinators and wildlife, enriching your yard’s ecosystem. Consider flowering natives like coneflowers, black-eyed Susans, or native grasses that provide visual interest throughout seasons while requiring minimal intervention.
6. Cottage Garden Style Mixed Plantings
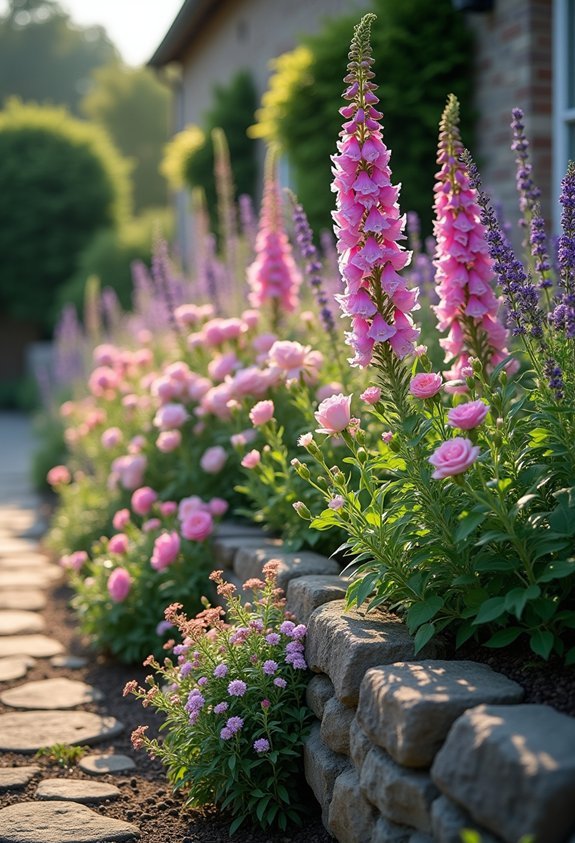
While native plants provide a low-maintenance foundation, cottage garden style lets you layer in diverse textures and colors that feel intentionally abundant rather than formally arranged. I’ve found that mixing perennials, annuals, and flowering shrubs creates dynamic visual interest throughout seasons. Combine tall delphiniums with sprawling catmint, add cheerful zinnias among salvias, and weave in ornamental grasses for movement. Don’t worry about perfect placement—cottage gardens thrive on organized chaos. Plant densely to crowd out weeds naturally and create that charming, established look. Include fragrant flowers like roses and lavender near pathways where you’ll notice their scent. This approach transforms your front yard into an inviting, personalized garden that reflects your style while remaining manageable and beautiful year-round.
7. Modern Minimalist Flower Arrangements
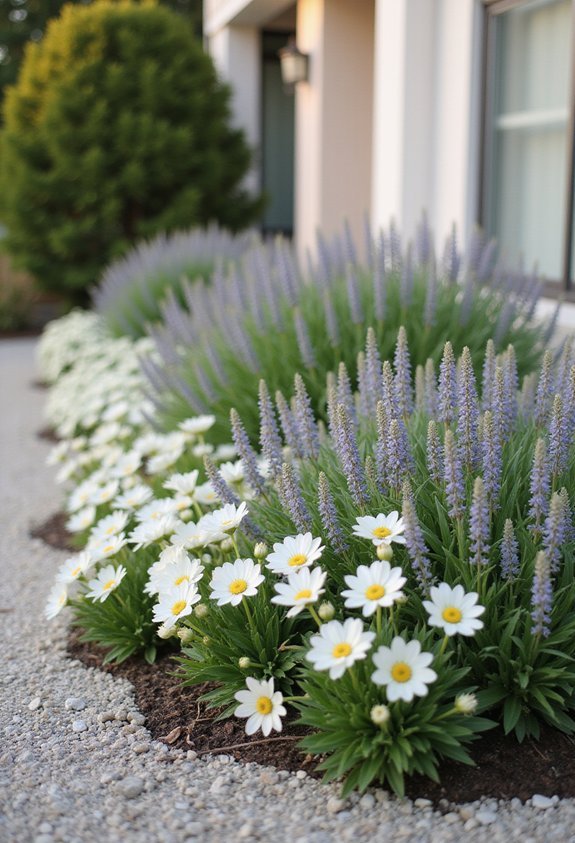
If cottage gardens feel too busy for your taste, modern minimalist flower arrangements offer an invigorating counterpoint: intentional simplicity that lets each plant shine. I’ve found that this approach relies on clean lines, limited color palettes, and strategic spacing to create visual impact.
You’ll want to select three to five complementary plants rather than cramming numerous varieties together. Consider using grasses, architectural shrubs, and specimen flowers in whites, grays, and soft greens. This restraint draws attention to each plant’s form and texture.
I recommend installing raised beds with crisp edges or incorporating pavers to define planting zones. The negative space—the empty ground—becomes as important as the plantings themselves. This design philosophy transforms your front yard into a sophisticated, low-maintenance landscape that feels intentionally curated rather than accidental.
8. Colorful Annual Combinations for Year-Round Color

Where minimalist designs rely on restraint, colorful annual combinations let you paint your front yard with vibrant hues that shift with the seasons. I’ve found that pairing complementary colors—like purple petunias with yellow marigolds or orange zinnias with blue salvia—creates stunning visual impact.
Annuals offer flexibility that perennials can’t match. You can redesign your beds each spring, experimenting with different color schemes without long-term commitment. I rotate my combinations yearly to keep my landscape fresh and engaging.
For continuous blooms, I plant fast growers like impatiens and begonias alongside slower bloomers. Deadheading spent flowers encourages prolific flowering throughout summer and fall. This approach requires modest maintenance while delivering maximum color payoff for your front yard investment.
9. Shade-Tolerant Plantings for Shaded Front Yards
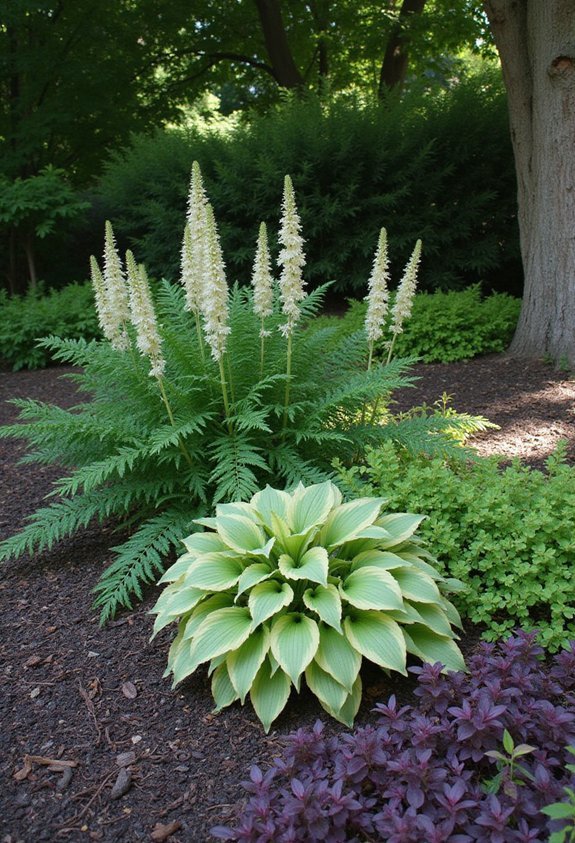
Unlike sunny beds that showcase vibrant annuals, shaded front yards demand a different strategy—one that celebrates plants thriving in low light. I’ve discovered that hostas, ferns, and hellebores transform dimly lit spaces into lush displays. These shade-lovers offer varied textures and colors without requiring intense sunlight.
I pair hostas with astilbe for feathery contrast, or combine ferns with coral bells for foliage interest. Shade-tolerant impatiens and begonias provide delicate blooms when you want pops of color.
The key is embracing what shade offers rather than fighting it. I’ve learned that strategic placement of these plants creates depth and dimension in areas other gardeners consider challenging. Your shaded front yard isn’t a limitation—it’s an opportunity for sophisticated, elegant landscaping.
10. Drought-Resistant Xeriscaping Options
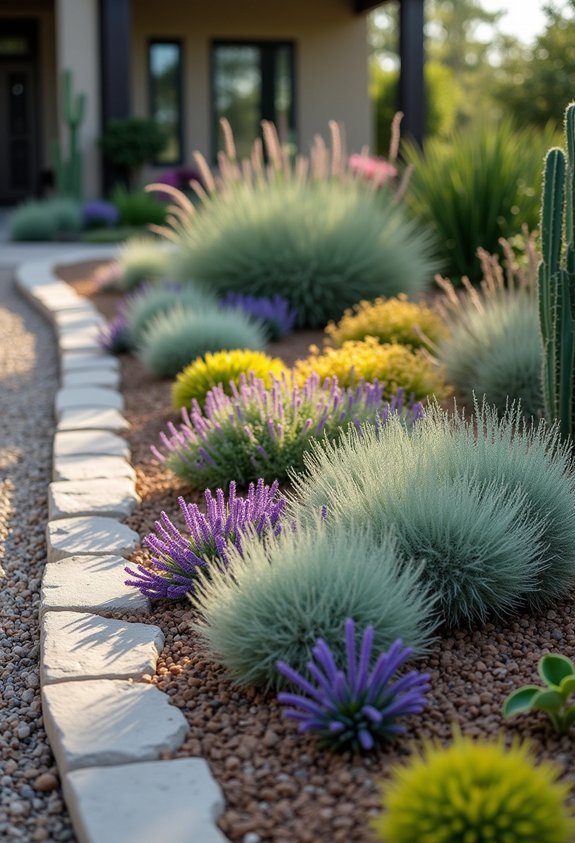
I’ve found that xeriscaping transforms water-conscious gardening from a limitation into an aesthetic advantage. You’ll discover that drought-resistant plants like sedums, ornamental grasses, and lavender thrive with minimal watering once established. These species showcase striking textures and colors while reducing your maintenance burden.
Incorporate rocks, mulch, and gravel to enhance visual interest and retain soil moisture. Strategic hardscaping creates natural focal points without requiring irrigation. Consider native plants adapted to your climate—they’ll flourish naturally with local rainfall patterns.
Group plants by water needs, positioning thirsty specimens near irrigation sources and drought-tolerant varieties in drier zones. This thoughtful arrangement maximizes efficiency. Xeriscaping doesn’t mean sacrificing beauty; it means choosing plants that align with your environment, creating sustainable landscapes that look gorgeous year-round.
11. Bulb-Forward Designs for Spring Displays

Every spring, you’ll witness nature’s most dramatic transformation when bulbs emerge from dormancy, delivering bold color precisely when you need it most. I’ve found that planning bulb-forward designs requires minimal effort for maximum impact.
I recommend layering tulips, daffodils, and crocuses at varying depths to create successive blooms from early to late spring. Plant larger bulbs deeper—about eight inches—while smaller varieties go three to four inches down. This staggered approach guarantees continuous color rather than everything flowering simultaneously.
I arrange bulbs in clusters of odd numbers for visual appeal, grouping similar colors together. This concentrated planting style creates stronger visual impact than scattered individual bulbs. Once you’ve planted them in fall, you’ll enjoy entirely hands-free spring displays the following year.
12. Fragrant Flower Beds Near Entryways
The moment you walk through your front door, fragrance sets the tone for your entire home. I’ve found that strategically placing scented flowers near your entryway creates an immediate sensory experience for you and your guests.
I recommend planting lavender, gardenias, or jasmine in beds flanking your doorway. These plants deliver powerful aromas without overwhelming your space. Roses and peonies offer classic fragrance with visual appeal, while sweet alyssum provides delicate scent at ground level.
Consider your climate when selecting varieties—some thrive in warm regions while others prefer cooler temperatures. Plant them where evening breezes carry their scent toward your entrance. This arrangement transforms your arrival home into a memorable moment, elevating your daily experience.
13. Pollinator-Friendly Garden Layouts
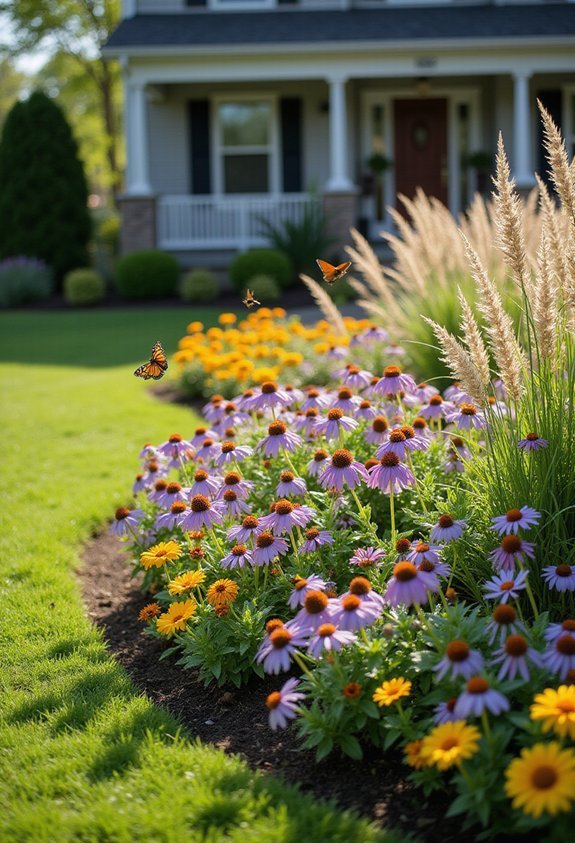
While fragrant flowers near your entryway create a welcoming atmosphere for you and your guests, they’ll also attract pollinators—and you can design your entire front yard to actively support these beneficial insects. I’ve found that clustering native plants together creates visual impact while providing abundant nectar and pollen sources. You’ll want to include flowers that bloom at different times throughout the season, ensuring pollinators have food when they need it most. I recommend adding shallow water sources like birdbaths and avoiding pesticides entirely. Leave some areas unmulched so ground-nesting bees can thrive. By incorporating flowering plants in varied heights and colors, you’re not just beautifying your space—you’re building a thriving ecosystem that benefits your entire neighborhood.
14. Mediterranean-Inspired Bed Designs
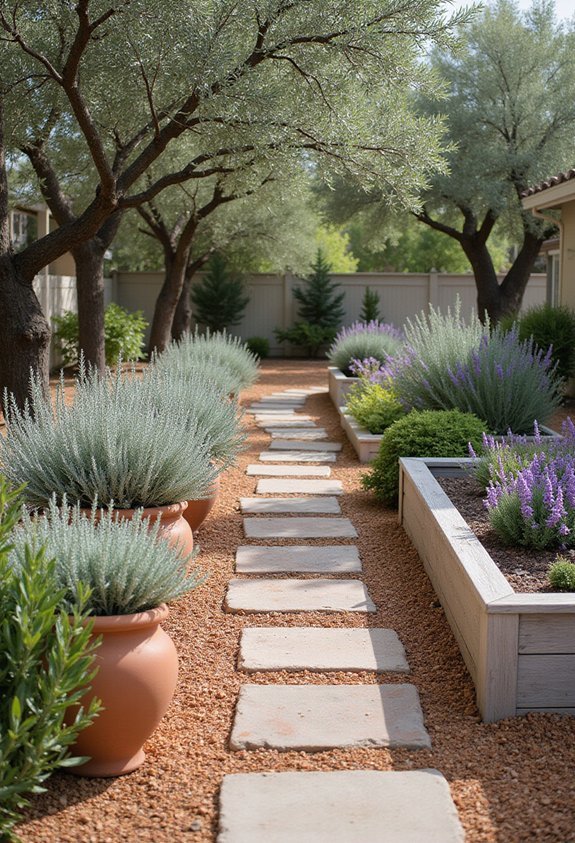
Mediterranean-inspired flower beds bring warmth, texture, and timeless elegance to your front yard. I’ve found that these designs thrive when you incorporate drought-tolerant plants like lavender, rosemary, and santolina. You’ll want to include ornamental grasses and silver-foliaged plants that echo the sun-baked landscapes of the Mediterranean region.
Layer your bed with gravel or terracotta-colored mulch to enhance the aesthetic while improving drainage. I recommend adding architectural elements such as stone edging, terra cotta pots, or a small focal point like a birdbath or statue.
The key is creating a naturalistic arrangement that appears effortlessly sophisticated. Space plants generously to avoid overcrowding, allowing air circulation that prevents disease. This approach requires minimal maintenance once established, making it perfect for homeowners seeking both beauty and practicality.
15. Perennial-Based Gardens for Lasting Beauty
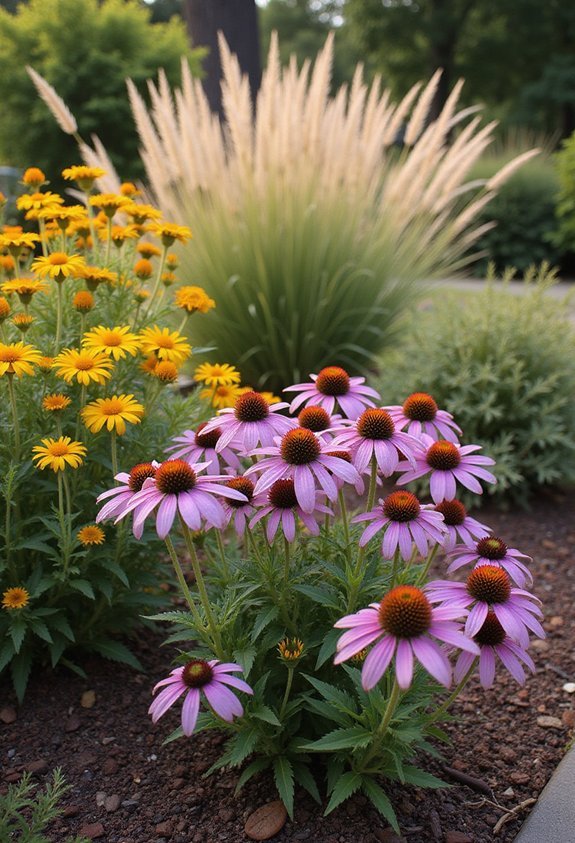
If you’re looking for flower beds that deliver year-after-year color with minimal replanting, perennials offer an unbeatable solution. I’ve found that combining hardy perennials like coneflowers, black-eyed Susans, and daylilies creates stunning front yard displays that return reliably each season.
What I appreciate most is their low maintenance requirements. Once established, these plants need minimal fertilizing and watering compared to annuals. You’ll save both time and money throughout the growing season.
I recommend grouping perennials by bloom time to guarantee continuous color from spring through fall. Mixing various heights creates visual interest, while selecting native species supports local pollinators. This approach transforms your front yard into a thriving ecosystem that looks beautiful year after year without constant replanting effort.
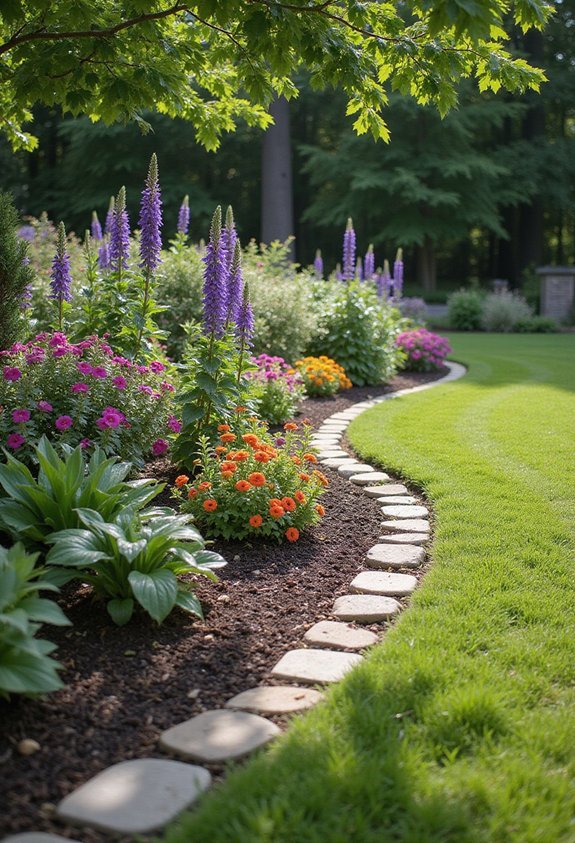
16. Edging and Border Techniques for Defined Spaces
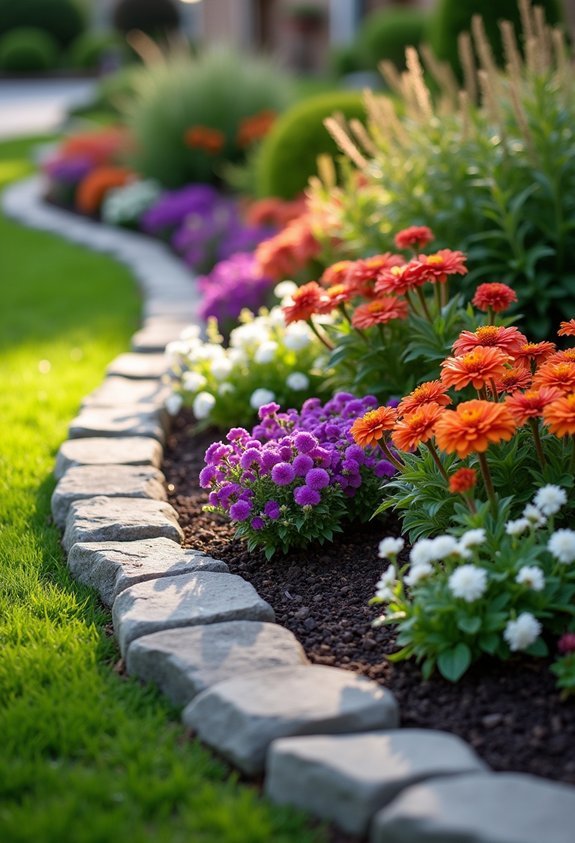
Clean edges separate your flower beds from lawn and hardscaping, giving your landscape a polished, intentional appearance. I’ve found that defining these boundaries transforms how your front yard looks overall.
You’ve got several edging options to evaluate. Metal strips provide sleek, modern lines and won’t rot. Plastic edging offers affordability and easy installation. Stone or brick borders add classic elegance and durability. For a natural look, I recommend layering mulch slightly higher at the bed’s perimeter.
When you’re installing edging, I suggest setting it slightly deeper than ground level to prevent grass from creeping into your beds. This approach saves you maintenance time later.
The right border technique creates clear separation between planted areas and lawn, making your flower beds appear intentional and well-maintained.
17. Budget-Friendly Starting Points for Beginners
You don’t need expensive materials or elaborate designs to create attractive flower beds—I’ve seen stunning results from budget-conscious gardeners who prioritize smart choices over costly installations. Start with seeds instead of mature plants; they’re cheaper and rewarding to nurture. I recommend visiting local nurseries for end-of-season sales where you’ll find discounted perennials.
Repurpose materials you already have: old bricks, stones, or reclaimed wood work wonderfully for edging. Create your own compost from kitchen scraps to enrich soil without buying amendments. Focus on hardy, low-maintenance plants like coneflowers or black-eyed Susans that thrive with minimal care.
Begin small with one or two beds, then expand gradually as your confidence and budget allow. This approach keeps costs manageable while building your gardening skills.
Frequently Asked Questions
How Often Should I Water My Flower Beds During Different Seasons?
I’d recommend watering your flower beds deeply twice weekly during spring and fall, daily in hot summer months, and every two to three weeks in winter when growth slows. Always check soil moisture first—it’s the best guide for what your plants actually need.
What Tools and Materials Do I Need to Build a Flower Bed?
I’d recommend you’ll need a shovel, garden fork, and rake for soil preparation. You’ll want landscape fabric, mulch, and edging materials like wood or stone. I suggest grabbing a wheelbarrow and gloves to make your project easier.
How Do I Prevent Weeds From Growing in My Flower Beds?
I’d recommend you lay down landscape fabric or cardboard before adding mulch to your flower beds. You can also apply a thick mulch layer—about 3 inches—which’ll suppress weeds naturally while keeping your soil moist and insulated.
When Is the Best Time to Plant Flowers in My Region?
I’d recommend planting flowers in spring after your last frost date, which you can find by checking your local garden center or USDA hardiness zone. This timing gives your blooms the best chance to thrive throughout the growing season.
How Much Soil and Mulch Do I Need for My Flower Bed?
I’d recommend measuring your bed’s length, width, and depth in feet, then multiplying those figures together to calculate cubic feet needed. You’ll typically want 2-3 inches of mulch and 6-8 inches of soil for most flowers.
Conclusion
You’ve got plenty of options to transform your front yard into a stunning display. Whether you choose classic rectangular beds, circular islands, or tiered designs, you’ll find an approach that fits your style and budget. Start with what appeals to you most—native plants for easy care or vibrant annuals for color. Your curb appeal will improve dramatically once you pick a design and get planting.