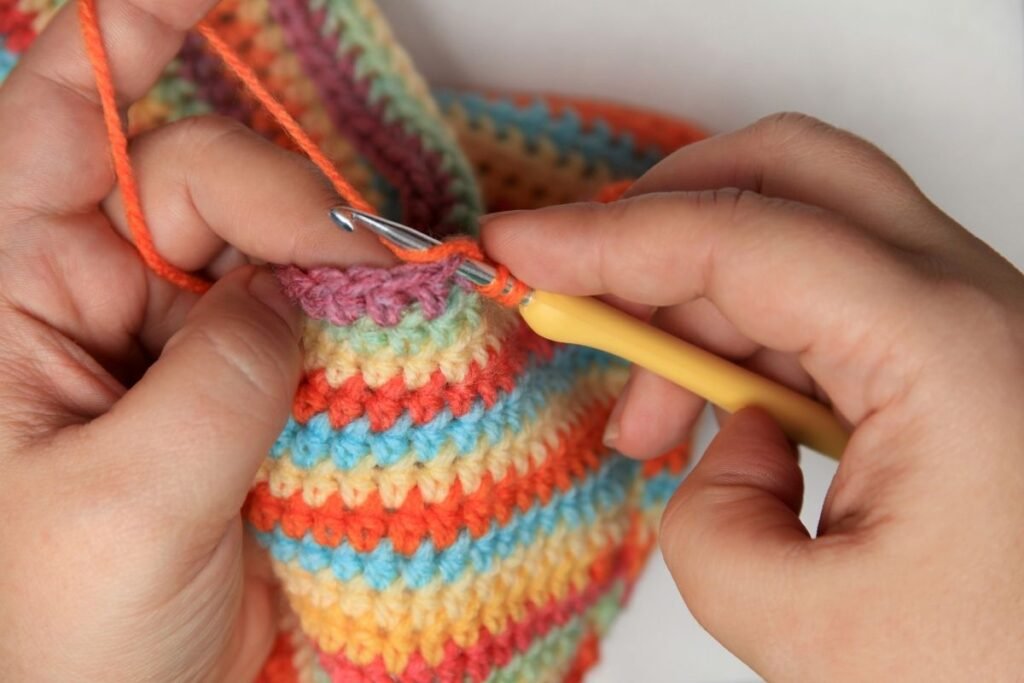
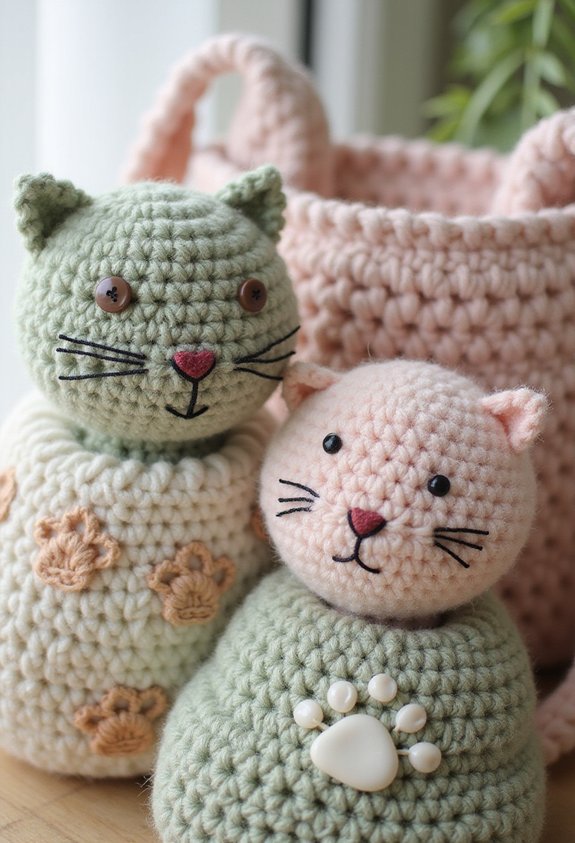
Sitting at my kitchen table with yarn and a crochet hook, I wasn’t thinking about making something adorable. I was just following a pattern, pulling loops through loops, watching something take shape in my hands. Then my daughter walked by and saw the small cat face forming on the fabric, and she stopped. She wanted it immediately. That’s when I realized adorable cat crochet bag ideas aren’t about perfection. They’re about the small details that make something feel alive.
The bag took three evenings to finish. Crooked stitches. One ear slightly larger than the other. But those imperfections are what make it feel real, like something with character instead of something manufactured. Now she carries it everywhere, and people stop her to ask where she got it. She tells them her mom made it, and there’s something in her voice that says she knows it’s not perfect. It’s better than that.
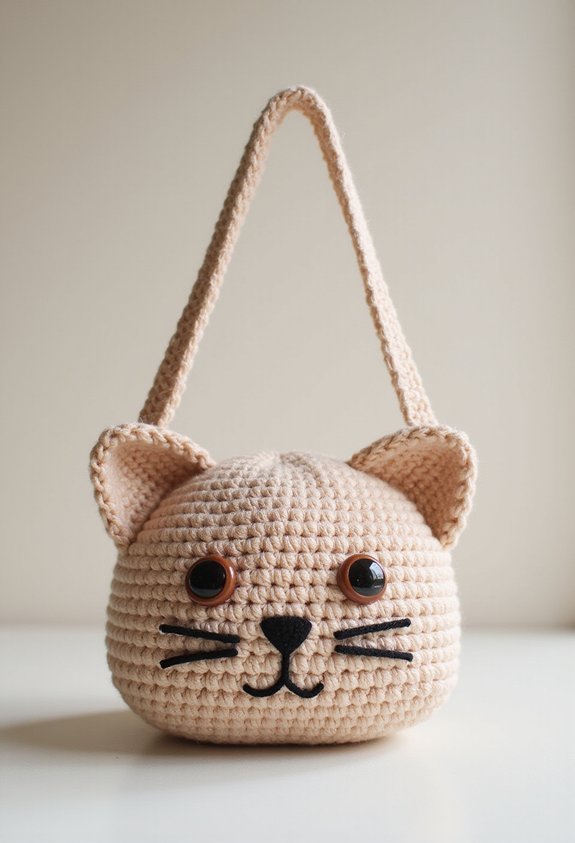
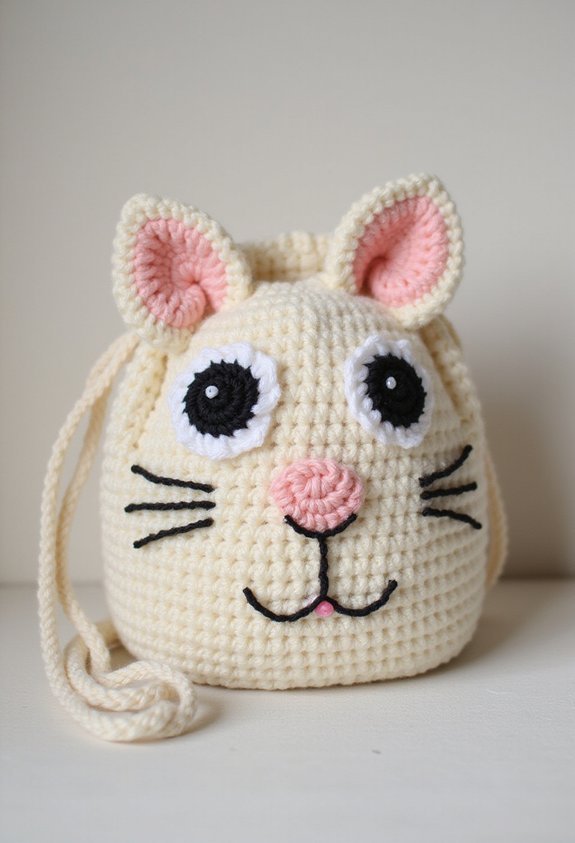
Cute Kitty Face Tote Bag
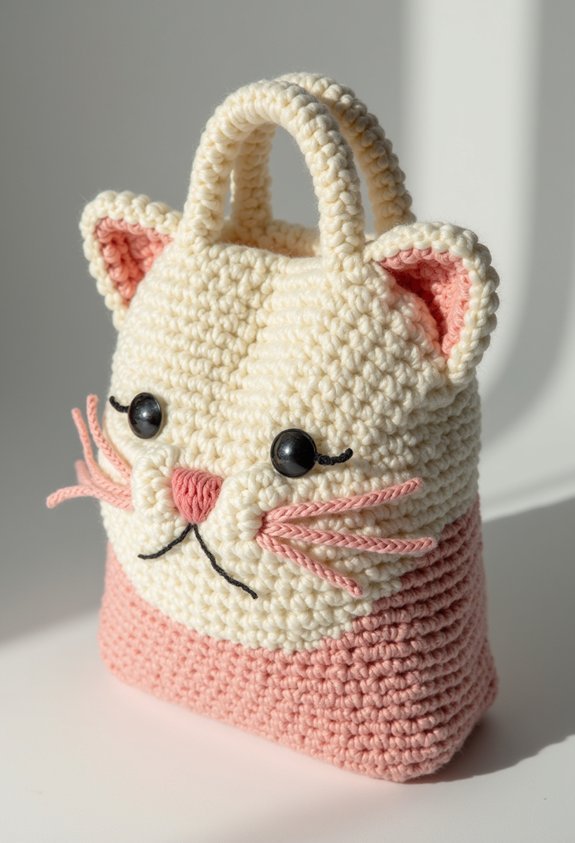
If you’ve ever wanted to carry a project that makes people smile, you’ll love creating a cute kitty face tote bag. I started mine by crocheting a sturdy rectangular base using worsted weight yarn in your favorite color. Then I added the cat’s facial features—two triangle ears on top and a round face panel in the front.
For the face, I stitched on two button eyes and embroidered a simple nose and mouth using black yarn. The whole project took me about eight hours spread across a few evenings. You’ll need basic crochet skills like single crochet and slip stitches to complete this bag.
The finished tote measures roughly twelve inches wide and holds groceries, books, or craft supplies perfectly. People always compliment mine!
Also read: 13 Creative Hand Embroidery Letter Ideas
Sitting Cat Drawstring Pouch
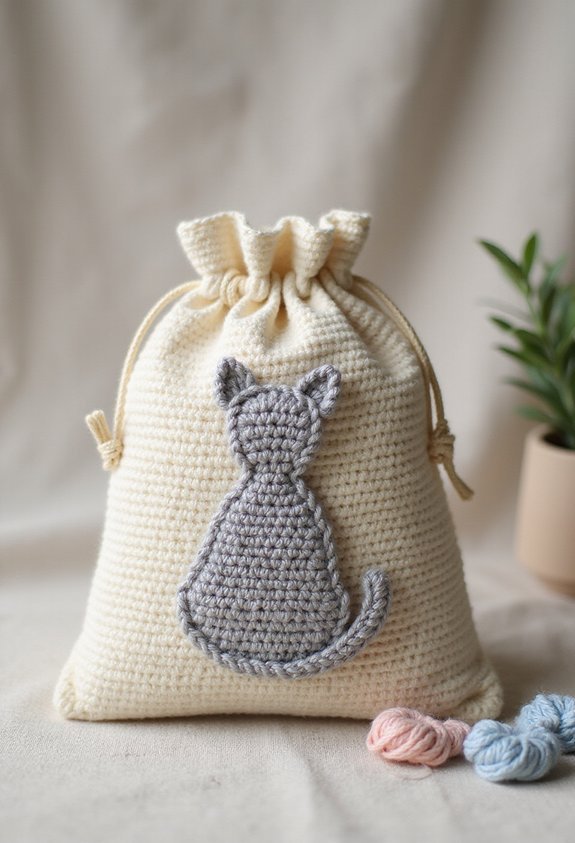
For a smaller project that’s just as charming, you’ll want to try making a sitting cat drawstring pouch. I find this project perfect when you want something quick but still adorable. You’ll crochet a simple rounded body in your favorite color, then add a head on top for that classic sitting position.
Start by creating a circle for the body using single crochet stitches. Once you’ve got that foundation, you’ll work upward to form the pouch’s depth. Next, attach the head piece and embroider two simple eyes with black thread.
For the drawstring, I recommend using yarn or thin cord that matches your color scheme. Thread it through stitches near the top opening. This little pouch works wonderfully for holding small items like coins or stitch markers.
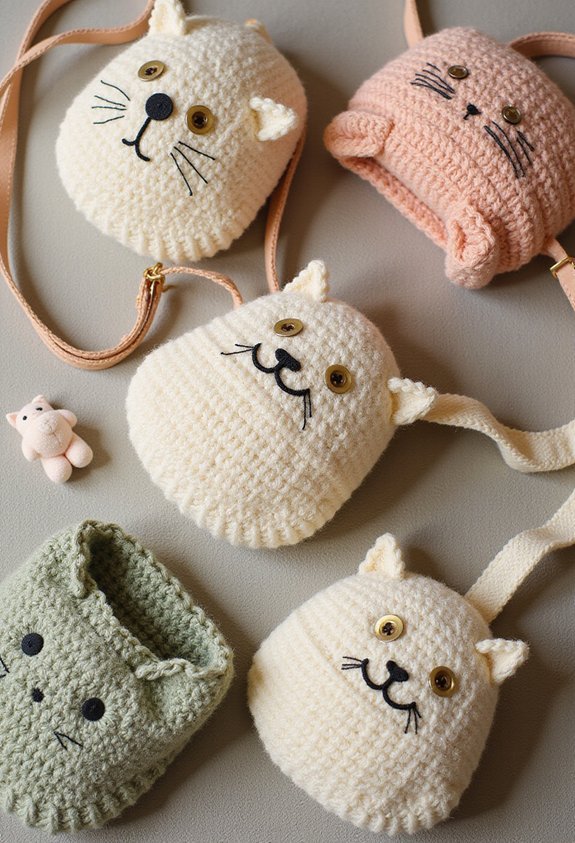
Cat Head Shoulder Bag
Now that you’ve mastered the adorable drawstring pouch, you’re ready to tackle something bigger and bolder: a cat head shoulder bag. This project combines your crochet skills with creative shaping to form an adorable feline face that doubles as functional storage.
Start by crocheting a large circular piece for the cat’s face using yarn in your chosen color. Then, you’ll add dimensional ears by increasing stitches strategically at the top. The tricky part comes when you’re stuffing and shaping everything to look proportional and cute.
Next, crochet a flat rectangular strip for the shoulder strap, making it long enough to comfortably drape across your body. Attach it securely to both sides of the head.
Finally, embroider or attach button eyes, a nose, and whiskers to bring your cat bag to life. You’ll love carrying this charming creation everywhere.
Tabby Striped Market Tote

Once you’ve conquered the structured shaping of a shoulder bag, you’re ready to explore colorwork—and a tabby striped market tote is the perfect next challenge. I found that alternating yarn colors every few rows creates those classic tabby patterns without complicated techniques.
Start with a sturdy base using single crochet in your main color. Then introduce your contrasting yarn, switching colors at regular intervals to build horizontal stripes. The beauty here is that you’re still working basic stitches; you’re just playing with color timing.
This project teaches you color shifts smoothly while building a genuinely useful bag. The structured market tote shape holds groceries beautifully, and those stripes? They’re honestly eye-catching. You’ll feel accomplished wearing something you’ve actually made.
Sleeping Cat Clutch
After mastering colorwork with your market tote, you’re ready to try something smaller and more whimsical—a sleeping cat clutch that’ll make you smile every time you use it. This project combines basic stitches with simple shaping to create an adorable pouch.
Start by crocheting a rectangular base in your cat’s main color. Then you’ll add the cat’s body using increases and decreases to form a rounded shape. The sleeping position means you don’t need detailed features—just embroider closed eyes and a tiny nose.
I love how forgiving this pattern is. If your stitches aren’t perfect, they just add to the handmade charm. Stuff it lightly with fiberfill, seam it closed, and attach a zipper to the opening.
You’ve got yourself a functional and utterly charming accessory.
Cat Ear Backpack

Ready to level up your cat crochet skills? A cat ear backpack combines functionality with adorable feline charm. I’ve found this project perfect for carrying essentials while showing off your craft work.
Start by crocheting a rectangular base using single crochet stitches in your chosen color. Make it about twelve inches wide and fourteen inches tall. Next, create two triangle-shaped ears using increase stitches, positioning them at the top corners.
Add a sturdy strap by crocheting a long chain and attaching it securely to both sides. I recommend using a thicker yarn for straps so they’ll support your bag’s weight comfortably.
Finally, embroider simple facial features—eyes, nose, and whiskers—using embroidery floss. Your finished backpack becomes both practical and whimsical, perfect for daily adventures or gifting to fellow cat lovers.
Whisker Detail Crossbody Bag
Let me walk you through creating a crossbody bag that’ll turn heads with its charming whisker details.
Start by crocheting a rectangular base using single crochet stitches in your favorite cat color. I recommend a soft gray or classic black. Once you’ve got your main body finished, it’s time for the fun part—adding those adorable whiskers.
Use embroidery floss or thin yarn to stitch long, delicate lines across the front. Space them evenly on both sides for balance. I like positioning mine slightly angled downward, which gives the bag personality.
Add a long adjustable strap using chain stitches, then attach it securely to both sides. Don’t forget small embroidered eyes and a nose to complete the face. Your finished bag works perfectly for daily errands and genuinely showcases your crochet skills.
Cat Paw Print Shopper
If you’ve mastered the delicate whiskers on a crossbody bag, you’re ready for something bolder. A cat paw print shopper is the perfect next step because it combines simple shapes with functional design. I love how paw prints work beautifully across larger surfaces without overwhelming the pattern.
Start by crocheting your basic tote structure in a neutral color like cream or gray. Then, using darker yarn, add paw pad circles using appliqué or embroidery techniques. The main pad goes in the center, with four smaller toe pads arranged around it.
Space your paw prints strategically across both sides. I typically place them where they naturally catch attention without competing with the bag’s structure. This project teaches you scale and composition while creating something genuinely useful for everyday carrying.
Silly Cat Face Bucket Bag
A silly cat face bucket bag takes your crochet skills in a playful direction that’s surprisingly approachable. I love how this project combines basic shaping with personality. You’ll start by crocheting a simple cylindrical base using single crochet stitches, which forms your bucket structure.
Next, you’ll add the cat’s facial features using appliqué or embroidery. I typically crochet small circles for eyes and attach them with yarn. For the nose, a triangle works perfectly, and you can embroider whiskers with embroidery thread.
The ears are triangular shapes you’ll sew onto the top. Once everything’s attached, your bag looks like an adorable cat face staring back at you. This project’s perfect because it’s forgiving—any wobbly features just add more charm and personality to your finished piece.
Cat Silhouette Messenger Bag
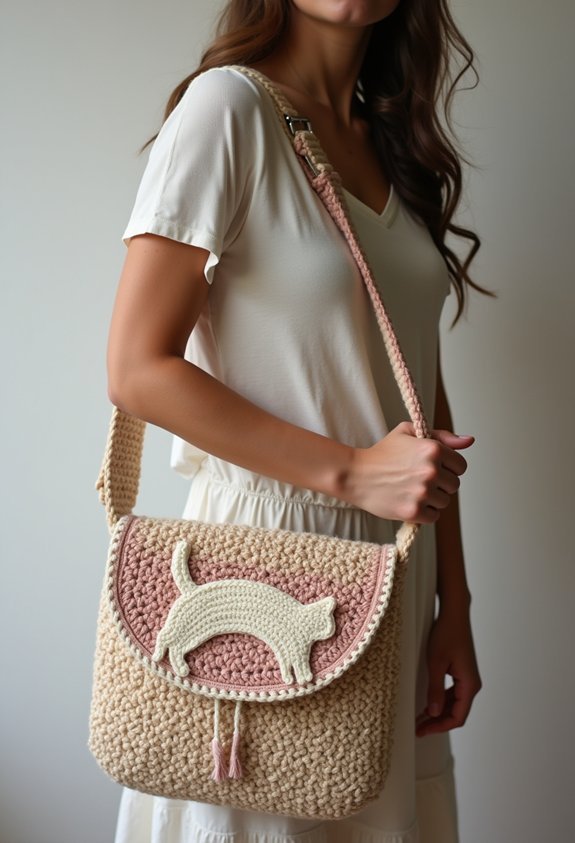
When you’re ready to level up your cat crochet projects, a messenger bag with a sleek cat silhouette offers the perfect next step. I’ve found this design combines functionality with feline charm perfectly.
Start by crocheting your bag body in a neutral color like gray or black. Once you’ve got the basic structure down, you’ll add the cat silhouette using contrasting yarn or appliqué technique. I recommend sketching your cat profile on paper first to nail the proportions.
The silhouette works best when positioned on the front flap, creating a striking focal point. Add a sturdy strap using sturdy single crochet stitches, and you’ll have a practical bag that showcases your cat-loving creativity. This project teaches valuable shaping skills while delivering something genuinely wearable.
Chubby Cat Coin Purse

Now that you’ve mastered shaping with the messenger bag, you’re ready to tackle something smaller and even more satisfying: a chubby cat coin purse.
I love how these little pouches work up quickly, usually in just a few evenings. You’ll start with a simple rectangle, then add a rounded head using increases that create that adorable puffy effect. The key is spacing your stitches evenly so the face looks balanced and sweet.
Once you’ve finished the main body, you’ll insert a zipper along the top—this part takes patience, but it’s worth it. Add some embroidered features or safety eyes, and you’ve got a functional piece that’s genuinely cute. Your friends will want one for their wallets immediately.
Cat Lover’s Everyday Carryall
Once you’ve conquered those adorable coin purses, you’re ready to level up to a project that’ll become your go-to bag for daily adventures. I started making cat carryalls because I needed something practical yet fun for carrying my crafting supplies around town.
The beauty of this project is its versatility. You’ll crochet a sturdy rectangular base using medium-weight yarn, then add handles that won’t strain your shoulders. I recommend using cat-themed color combinations—think orange tabby stripes or calico patches—to make it uniquely yours.
Start with basic stitches like single and double crochet. Build your sides up gradually, checking dimensions as you go. Once you’ve got the main structure complete, add a playful cat face appliqué on the front. It’s functional, adorable, and honestly, you’ll reach for it constantly.
Frequently Asked Questions
What Yarn Weight and Fiber Type Works Best for Durable Cat Crochet Bags?
I’d recommend you use worsted weight or bulky yarn for durability. I find acrylic blends or cotton work best since they’re washable and resist pilling. I suggest avoiding delicate fibers; you’ll want something that’ll withstand daily use and frequent handling.
How Do I Safely Attach Eyes and Embellishments to Cat Bag Designs?
I’d recommend using safety eyes with secure shanks that you’ll firmly anchor through your crocheted fabric into the inner lining. For embellishments, I stitch them down with matching yarn using whip stitches, ensuring they’re tight so they won’t come loose during regular bag use.
Can These Cat Bag Patterns Be Adjusted for Different Sizes and Skill Levels?
I’ll tell you that yes, I can absolutely adjust these patterns for you. I scale them up or down by changing yarn weight and hook size, while I simplify stitches for beginners or add complexity for advanced crocheters like yourself.
What’s the Estimated Time Commitment for Completing Each Cat Crochet Bag Project?
I’d estimate you’ll spend 8-15 hours completing a cat crochet bag, depending on its complexity. Simpler designs take a weekend, while intricate ones require 2-3 weeks of steady work. Your skill level and how often you crochet drastically/vastly/tremendously impact your timeline.
How Should I Care for and Clean Finished Cat Crochet Bags Properly?
I’d recommend hand-washing your cat crochet bag in cool water with mild detergent. Gently squeeze the soapy water through the fabric, rinse thoroughly, and lay it flat to dry. Avoid wringing or machine washing, which can damage the delicate stitches and shape.
Conclusion
You’ve got nine fantastic cat bag projects to choose from now. Whether you’re drawn to playful faces or sleek silhouettes, there’s something here for every skill level. Pick a pattern that excites you, gather your yarn and hook, and start creating. You’ll end up with a one-of-a-kind bag that shows off your crochet skills and your love for cats. Get stitching!