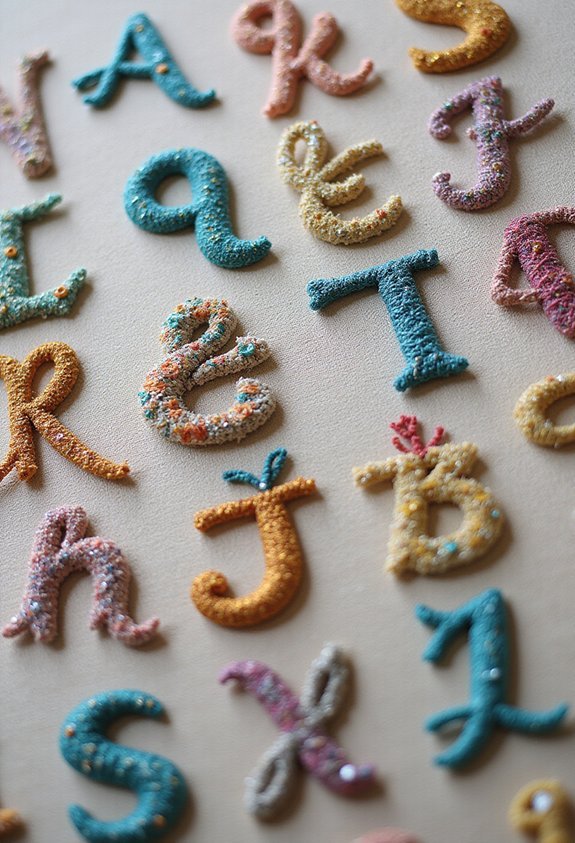
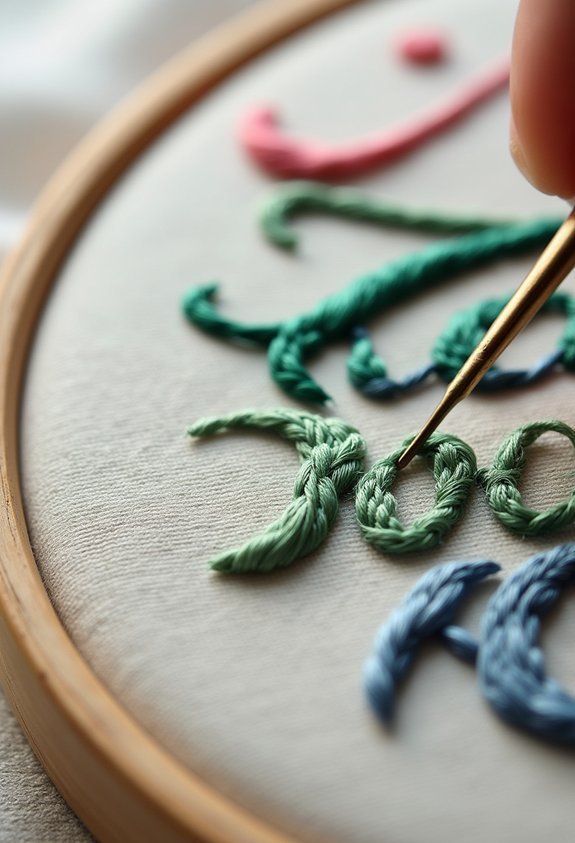
Threading a needle for the first time in decades felt clumsy and small, but there was something satisfying about it. Hand embroidery letters ideas seemed intimidating until I realized I was just making marks on fabric with thread. Messy marks at first. Uneven stitches. Letters that tilted when they should have been straight. But something shifted the more I worked. My hands remembered the rhythm. The mistakes became part of the texture instead of flaws.
What surprised me was how the slowness felt necessary. No rushing. Just one stitch after another, building letters that would last. Each project became a conversation between my hands and the fabric. By the third piece, the letters weren’t perfect, but they were honest. They carried the time I’d spent on them, visible in every imperfect stitch.
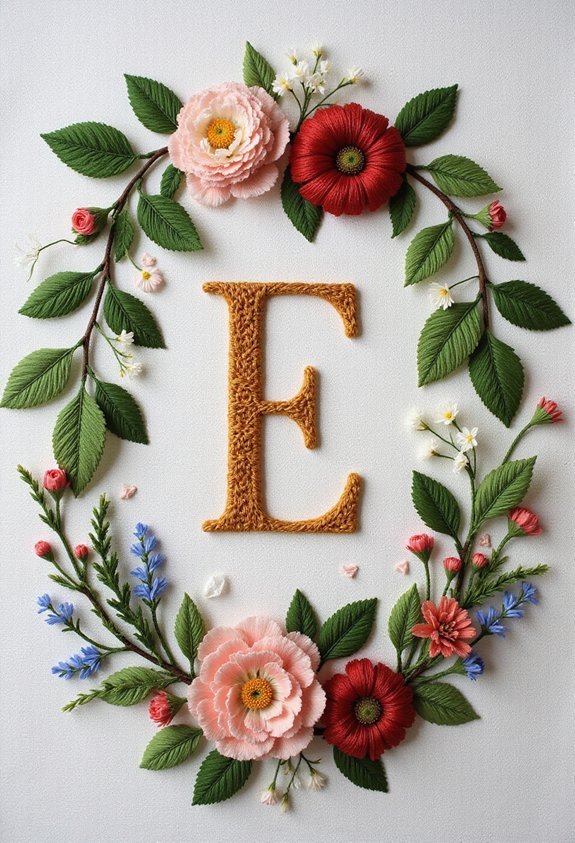
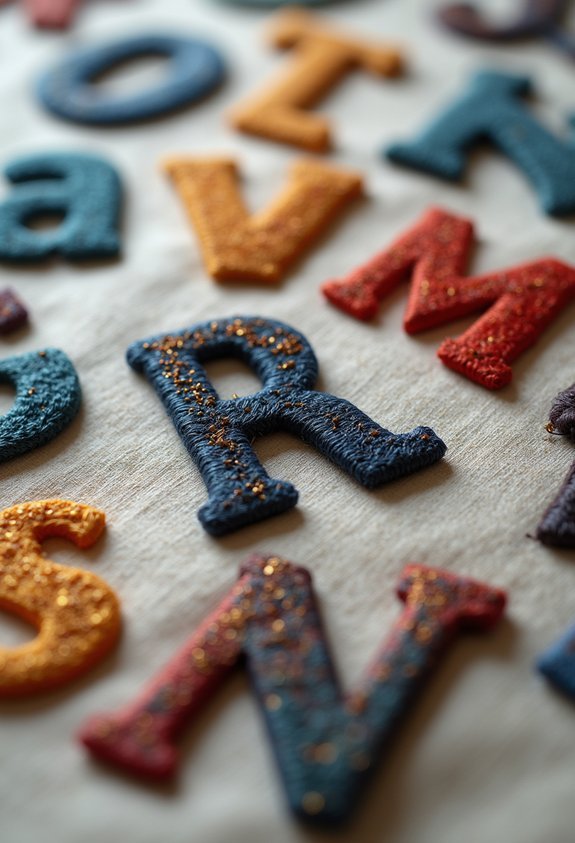
1. Floral-Adorned Capital Letters
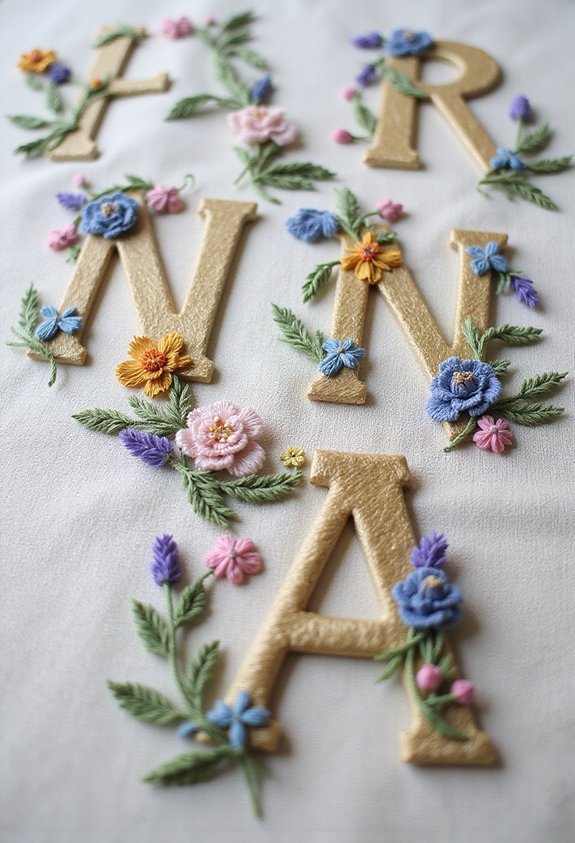
You’ll find that decorating capital letters with floral elements transforms ordinary embroidery into gallery-worthy artwork. I’ve discovered that combining botanical designs with letterforms creates stunning visual impact for personalized projects.
Start by sketching your capital letter in pencil, then map out where flowers’ll sit within and around it. I recommend using split stitch for letter outlines, which provides crisp definition. For petals, I layer French knots and satin stitch to create dimension and depth.
Choose thread colors that complement your flowers—soft pinks work beautifully with roses, while vibrant greens enhance leaf details. I’ve found that mixing different floral varieties—tulips, daisies, and lavender—prevents monotony.
This technique works exceptionally well for monograms, journal covers, and framed pieces. Once you master the basics, you’ll develop your own signature style that makes each letter uniquely yours.
Also read: 13 Creative Raffle Basket Ideas for Any Event
2. Minimalist Linear Letterforms
While floral embroidery celebrates abundance and decoration, minimalist linear letterforms embrace the opposite philosophy—stripping letters down to their purest geometric forms. I find this approach incredibly satisfying because it challenges you to convey elegance through restraint.
When you’re working with minimalist letters, you’ll use simple straight stitches and clean lines to define each character. I recommend selecting a single thread color and letting the letterform’s structure do the heavy lifting. This technique works beautifully on contemporary projects—think modern monograms or sleek typography designs.
The beauty here lies in precision. You’ll discover that removing every decorative element forces you to perfect your letterforms’ proportions and spacing. Start with pencil guidelines and stitch confidently along them. This minimalist approach proves that sometimes less truly is more.
3. Vintage Serif Designs With Period Charm
If minimalist letterforms represent restraint, vintage serif designs embrace storytelling through ornamentation. I find these classic letterforms alluring because they carry historical weight and elegance.
When I embroider vintage serifs, I focus on their distinctive features: delicate hairline strokes, pronounced serifs, and refined proportions. These elements demand precision but reward you with sophisticated results.
I recommend starting with traditional typefaces like Garamond or Caslon as inspiration. Their timeless quality translates beautifully into thread.
The charm lies in the details—tiny flourishes, subtle curves, and varied line weights. I use varying thread thicknesses to capture these nuances, creating depth and authenticity.
Vintage serifs work wonderfully on projects requiring elegance: monogrammed linens, heirloom pieces, or decorative artwork. They’re perfect when you want your embroidery to whisper sophistication rather than shout modernity.
4. Modern Abstract Letter Styles
Modern abstract letterforms often break free from recognizable alphabets entirely, embracing geometry, asymmetry, and expressive mark-making instead. When I embroider these styles, I focus on creating visual interest through unexpected angles and layered stitches.
You’ll find that abstract letters work wonderfully with contemporary décor. I combine straight stitches with French knots to build texture and dimension. Splatter effects—achieved by scattering small stitches randomly—add spontaneity and movement.
What makes this approach exciting is its freedom. You’re not bound by traditional letterforms, so you can experiment boldly. Try incorporating negative space by leaving portions unstitched. Mix metallic threads with standard embroidery floss for contrast.
These pieces suit modern minimalist projects beautifully. They’re perfect for statement wall art or artistic garments where unconventional expression trumps readability.
5. Dimensional Shadow Stitching Techniques
How can you create letters that appear to float above your fabric? Dimensional shadow stitching‘s the answer. I’ll show you how to master this striking technique.
Start by stitching your letter outline in a darker thread. Then, offset a second outline slightly below and to the side—this creates the shadow effect. Fill the gap between outlines with parallel stitches using a medium-toned thread, building depth gradually.
Layer your stitches strategically. I use backstitch for crisp outlines, then fill with split stitch or satin stitch for dimension. The key’s maintaining consistent spacing between your offset lines.
Experiment with thread colors. Darker shadows beneath letters enhance the floating illusion. Lighter threads on top create highlights. This contrast makes your letters truly pop off the page, giving them remarkable three-dimensional presence.
6. Metallic Thread Embellishments
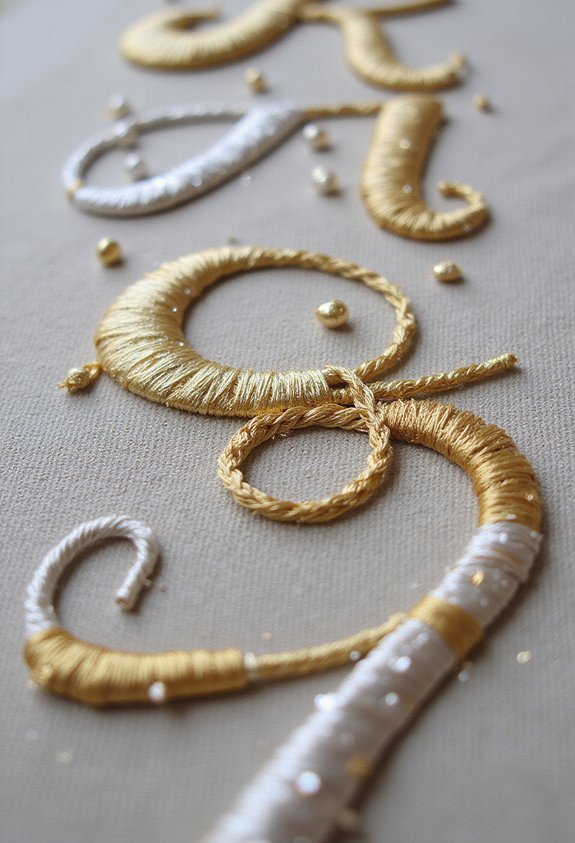
Metallic threads transform embroidered letters into luminous, eye-catching designs that capture light beautifully. I’ve found that gold, silver, and copper threads add instant elegance to any project.
When I work with metallics, I use shorter thread lengths since they’re more prone to fraying. I recommend splitting them into thinner strands for delicate lettering, which gives you better control and prevents puckering.
I’ve discovered that metallic threads work wonderfully for outlining letters or filling specific sections rather than entire words. Pairing them with standard embroidery floss creates striking contrast. You’ll want to use a slightly larger needle and guarantee your fabric’s taut to prevent snagging.
The results are worth the extra care—your letters’ll shimmer with sophistication.
7. Watercolor-Inspired Blended Embroidery
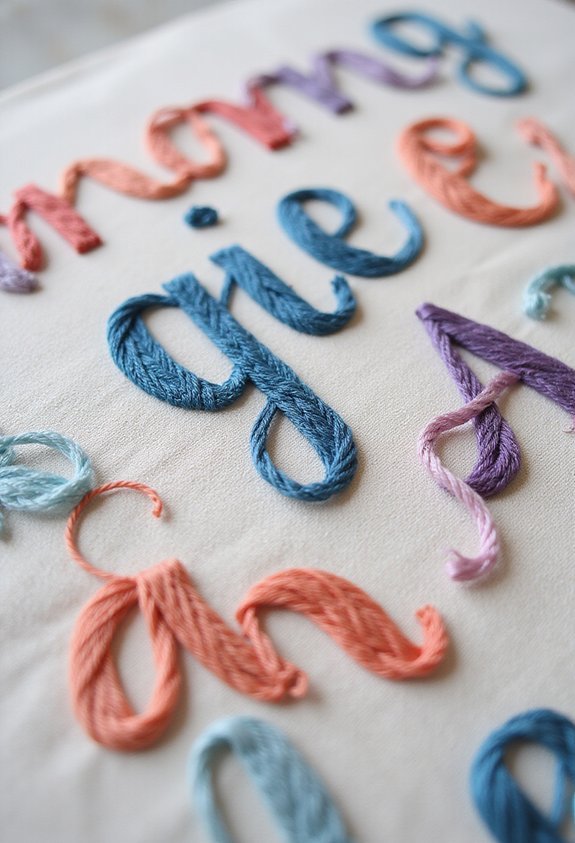
While metallic threads offer brilliance through shimmer and shine, watercolor-inspired blended embroidery achieves luminosity through color gradation and subtle layering. I’ve found this technique transforms letters into soft, painterly compositions that seem to glow from within.
To master this approach, you’ll blend multiple thread colors within single stitches, shifting gradually between hues. I recommend starting with analogous colors—those sitting adjacent on the color wheel—for seamless shifts. Use split stitches or long-and-short stitches to create the blending effect naturally.
The magic happens when you layer semi-transparent color combinations. I’ve discovered that working with lighter values first, then adding deeper tones, builds dimension without overwhelming the letter’s form. This method creates letters that capture watercolor’s fluidity and delicate translucence on fabric.
8. Gothic Blackletter Lettering
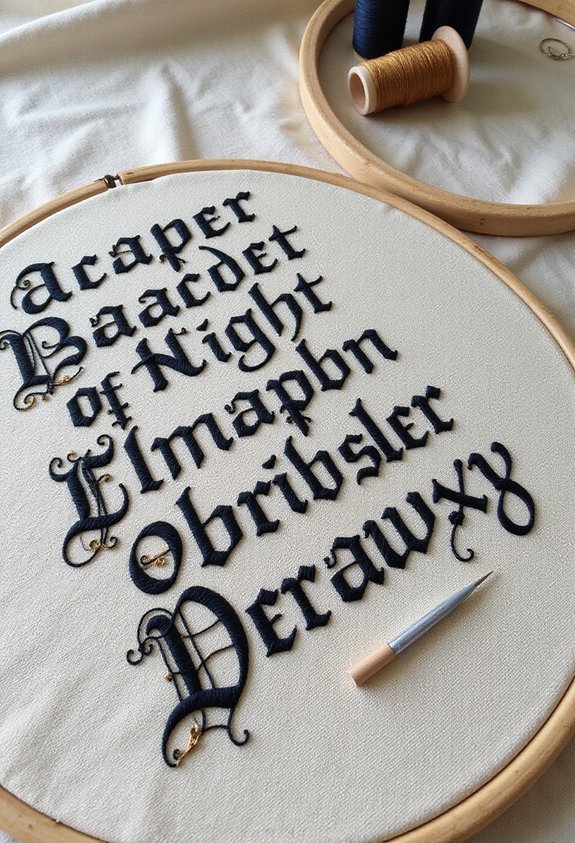
Gothic blackletter lettering demands a departure from the soft, flowing aesthetic we’ve just explored—it’s a bold, architectural approach that commands attention through weight and structure. You’ll find that thick, dramatic strokes create striking visual impact on fabric.
When I embroider blackletter, I use split stitch and backstitch to build substantial letterforms with sharp angles and pronounced serifs. The technique requires patience; each stroke must maintain consistent thickness and deliberate spacing.
I recommend working with heavier thread—embroidery floss in multiple strands or even pearl cotton—to achieve authentic presence. Start with capital letters or short words to practice the distinctive rhythm and angular geometry.
This style suits monograms, historical pieces, and projects demanding sophistication. The interplay between negative space and embroidered lines creates dramatic definition that transforms your designs into statement-making art.
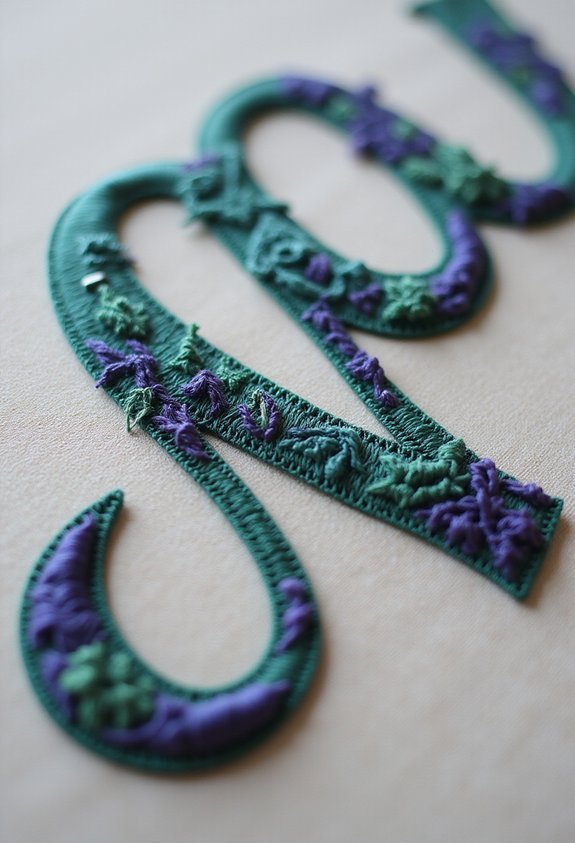
9. Botanical Border Framing
Where blackletter’s architectural precision demands rigid control, botanical borders invite you to embrace organic movement and natural curves. I’ve found that framing letters with embroidered plants creates stunning visual impact while allowing creative freedom.
Start by sketching your letter, then design flowing vines, leaves, and flowers around it. I recommend using split stitch for delicate stems and satin stitch for fuller botanical elements. Vary your thread colors—greens, golds, and soft purples work beautifully together.
The beauty here? You needn’t achieve perfect symmetry. Nature’s imperfection is your advantage. Let stems meander, overlap leaves intentionally, and scatter small blooms throughout your border. This approach transforms simple letterforms into miniature garden landscapes that captivate viewers while remaining technically manageable for embroiderers of any skill level.
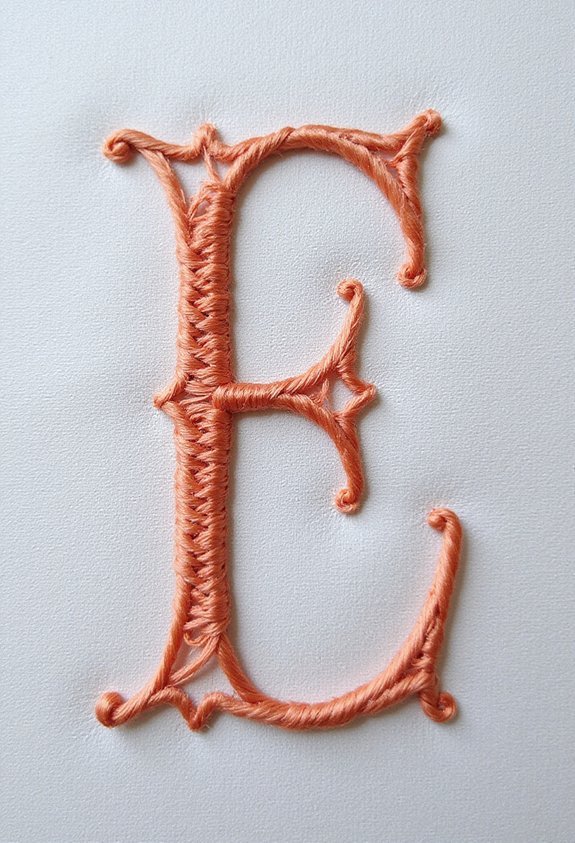
10. Split Stitch Outline Methods
Precision defines the split stitch—it’s the embroiderer’s most reliable tool for creating clean, controlled letterforms. I’ve found that this technique works exceptionally well for outlining letters because it produces sharp, defined edges that make characters instantly recognizable.
Here’s how I approach it: I bring my needle up through the fabric, then pierce the center of the previous stitch before pushing down. This splits the thread, anchoring each new stitch firmly. The result? Crisp lines that follow your letter’s contours beautifully.
I recommend using thread that contrasts with your fabric background. This visibility helps you maintain consistent stitch placement along curved and straight sections. Practice on paper first to develop your rhythm. You’ll soon notice how the split stitch transforms your letterwork from amateur to polished.
11. Negative Space Letter Designs
You’ll start by sketching your letters lightly on fabric, then fill the surrounding space with stitches. I typically use satin stitch or long and short stitch for this method, creating solid, vibrant backgrounds that make your letters pop.
The beauty here? Your letters stay clean and crisp without any outline work. This approach works beautifully on darker fabrics where you want high contrast. It’s perfect when you’re working with bold, geometric letterforms that don’t require intricate detail.
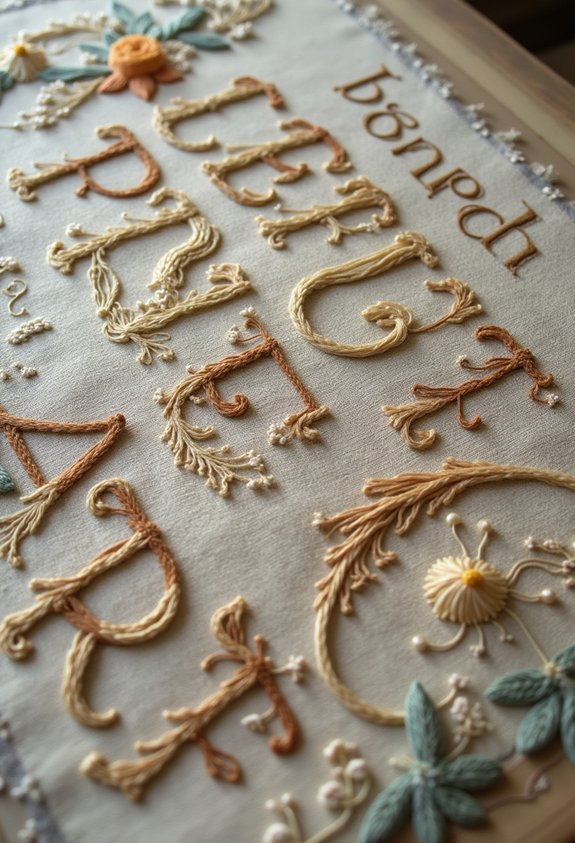
12. Whimsical Calligraphic Flourishes
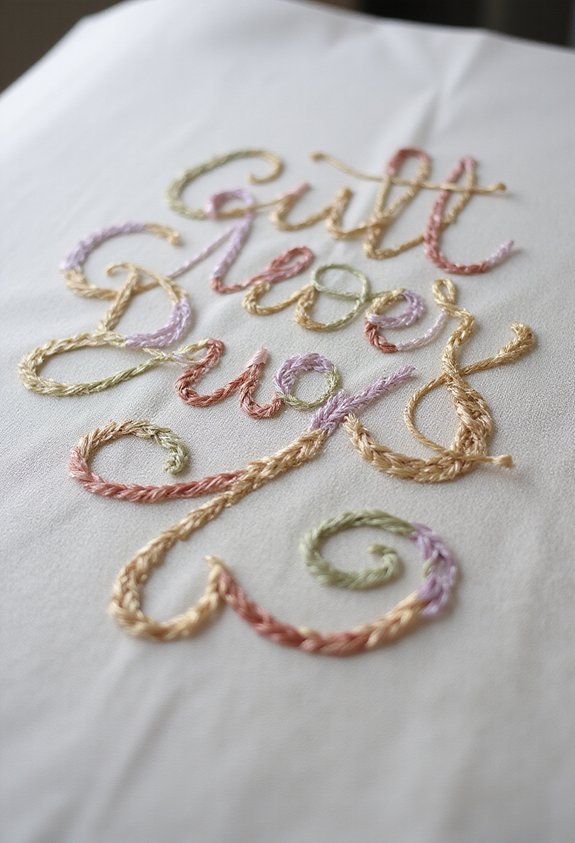
If I had to pick my favorite embroidery style, it’d be whimsical calligraphic flourishes—they’re where letters transform into art. These elaborate letterforms incorporate flowing loops, swirling tails, and decorative extensions that dance across your fabric.
I find that combining traditional calligraphy with embroidery creates stunning visual interest. You can use thread to emphasize the thick and thin strokes inherent in calligraphic letters, adding dimension through layered stitching. Experiment with varying thread weights and metallic accents to make your letters shimmer.
The beauty lies in balancing structure with playfulness. Your letterforms remain legible while flourishes extend organically into surrounding space. Consider adding small botanical elements or geometric patterns within the letter bodies. This approach elevates simple letters into intricate focal points that capture attention and admiration.
13. Textured Fill Stitch Variations
Once you move beyond flat fills, textured stitches transform letters into tactile surfaces that invite touch. I’ve discovered that French knots create delightful dimensional bumps perfect for filling curved letterforms. Seed stitches offer a subtle, granulated texture that catches light beautifully. Long and short stitches blend colors while maintaining visual interest through their varied angles.
You’ll find that experimenting with these techniques dramatically elevates your embroidered alphabet. Bullion knots produce bold, rope-like textures ideal for vintage-inspired designs. Satin stitch variations, when layered at different angles, generate sophisticated depth. I recommend practicing each stitch on sample letters before committing to your final piece.
The interplay between thread direction and stitch choice determines your letter’s personality. These textured variations transform simple alphabets into stunning focal points.
Frequently Asked Questions
What Fabric Types Work Best for Hand Embroidery Lettering Projects?
I’d recommend using linen, cotton, or Aida cloth for your lettering projects. I find these fabrics provide excellent stitch definition and stability. They’re forgiving enough for beginners, yet they’ll hold your embroidered letters beautifully without puckering or distorting.
How Do I Transfer Letter Designs Onto Fabric Before Embroidering?
I’ll share my favorite transfer methods with you. I use a light box with tracing paper for precision, or I apply water-soluble pen directly onto fabric. You can also try dressmaker’s carbon paper—it’s reliable and won’t damage your material.
Which Needle Sizes Are Recommended for Different Embroidery Thread Weights?
I’d recommend using size 7-9 needles for lightweight threads, size 5-7 for medium weights, and size 1-3 for heavy threads. I’ve found matching your needle to thread thickness prevents fabric damage and guarantees smooth, even stitching in your letter designs.
How Can I Prevent Thread Tangling While Embroidering Detailed Letterforms?
I’ll help you prevent thread tangling while embroidering detailed letterforms. I recommend keeping your thread shorter—about 18 inches—and conditioning it with beeswax before stitching. I also suggest working slowly through intricate areas and untangling knots immediately when they form.
What’s the Best Method to Finish and Preserve Completed Embroidered Letters?
I’d recommend sealing your embroidered letters with a fabric stiffener spray, then mounting them on acid-free backing. Frame them behind UV-protective glass to prevent fading. Store finished pieces flat in archival boxes, away from direct sunlight and moisture.
Conclusion
You’ve discovered thirteen compelling ways to transform letters into embroidered art. Whether you’re drawn to floral elegance, minimalist simplicity, or bold abstractions, hand embroidery gives you unlimited creative freedom. I encourage you to experiment with these techniques—mix shadow stitching with split stitch outlines, combine whimsical flourishes with textured fills. Your needle becomes a paintbrush, each thread a brushstroke. Start with one method, then blend approaches that speak to your artistic vision.